
Additional Game Settings v 1.1.0.1

Additional Game Settings v 1.1.0.1
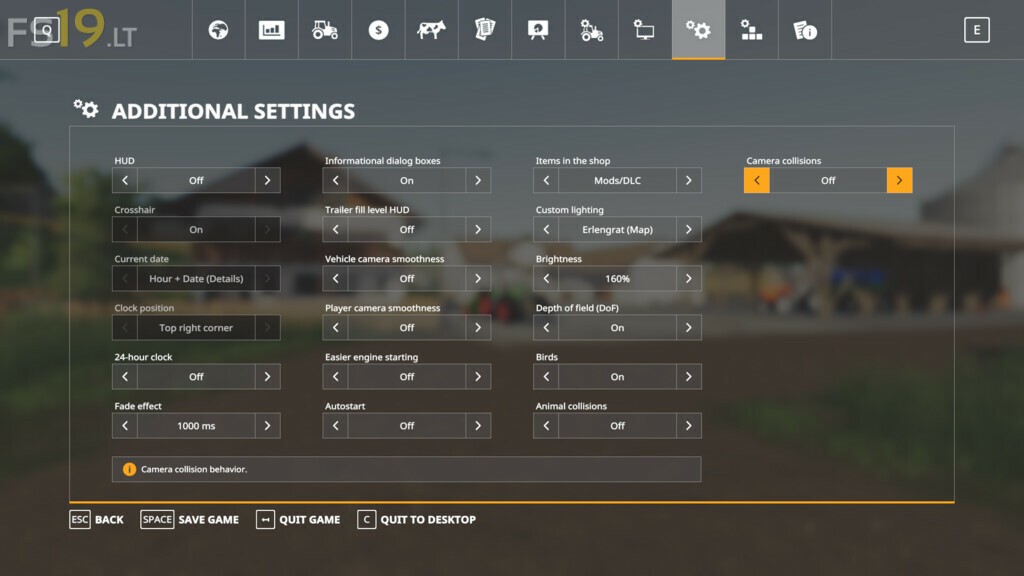
This Modification adds a New Tab with Settings to the Pause Menu
Available Settings:
– Changing the visibility of the interface
– Changing the visibility of the crosshair
– Changing the time format
– Displaying the current date
– Displaying the fade effect when switching cameras
– Changing the visibility of dialog boxes
– Displaying a fill indicator above the trailer
– Changing the smoothness of the camera movement
– Easier engine starting (starting the engine by pressing the accelerate key)
– Automatically starting savegame after loading is complete
– Changing visibility of non mod/DLC items in the shop
– Changing of the environment lighting
– Changing of the brightness of the environment
– Changing of the depth of field setting
– Changing the visibility of birds in the game world
– Changing animal collision behavior
– Changing the camera collision behavior
Version 1.1.0.1:
* Fixed an issue with missing fill type icon on fill indicator
* Removed the fade out effect when switching from player camera to cut camera
* The filtering function for objects in the store has been improved (modifications with the changed “dlcTitle” were shown as DLC)
* Minor bug fixes and improvements